Third Eye Gypsy(Genea Beads) 2011 by Parigo Studios 2010

Thursday, August 1, 2013

Bead Fest Philly August 2013- Continuing Show Prep

Hello friends!

Wow is it getting INTENSE! Bead Fest Philly August 2013 is RIGHT around the corner! I have been busily working behind the scenes getting ready. You can see my first post about show prep at the Love My Art Jewelry blog here. So much has come together since that post. I have been steadily receiving orders for displays, Staci and my collab magazine in Belle Armoire arrived, my banner, and business cards arrived, and I have a small box of glass on the way! 

So before I spiral off on a tangent here is a coupon for $5 entry to Bead Fest! Just print this off and bring it to the show to receive your discount! Please feel free to share with friends! 

I started this little Pinterest board to show some Sneak Peeks of some beads some of my friends and I will be bringing to Bead Fest. Some are beads that have not been sold before and will debut at the show!  I need to add some more things to the board, but you can be sure to see a wonderful selection of my body of work from the last year as well!

So now is the fun part where you get to see what I have been up to in photos and who doesn't like photos?! :D

What is making beads without some burns?! Ouch! 

I caught the glass in between my fingers before dropping it on the floor! 

Bright Earth "Weeny Dings"! 

Some "Ocean Urchin Serpent Eggs" and "Ocean Serpent Eggs"! Aren't they AMAZING XL size?!

At first I wasn't sure about these black necks. I had originally wanted to do all Linen cause I wanted to have that "recycled" look to them, but the black necks really make the beads *POP*.

My little earring hangers. Ricky helped me order. We thought we were only getting 5 and they came two in a bag! Awesome cause I LOVE to make earrings! He he.

After looking over my table of beads I thought, "OMG I need to make more of THOSE!" So here they are!

I was bummed to not find kraft paper bags, so I had to settle for the white bags. They are kinda crappy quality, but they work. I thought maybe I could get away with just stamping them in a solid color, but they are way more dynamic multi-colored. *sigh* 
I loaded up my counter top with them. In this photo there are 56 bags strewn across the counter! I must have stamped almost 250 bags!
Each bag was then loaded with my new simpler style business card. Sorry for the dark cell photos. 

Here is a look at my table display. It was more laid out to see how things looked on the different color tray backings and to see what beads I needed to make versus actually doing the display. I still need to make my wooden boxes for height.

Who knew?! The black looks AMAZING on the linen. I also put the store textured beads on the linen as well. I really want you to be able to see the texture well.

The bright beads looked good on the light bamboo mat. I also made a little sign. I heard awhile back that having eyes watching you made you less likely to steal. How about the "Wisdom Eyes of Buddha" watching you with  a friendly little reminder?! :P

The ivory urchins look really amazing on the black!

Doesn't this "Ocean Serpent Egg" look awesome on the chocolate brown bamboo mat?! Oh and I was trying out the idea of doing smaller GB tags in the future. I sure can't go back now and re-tag everything... or well... NO, NO.. they will have to be just fine. Lol.


Oh and you know I had to make some smaller "Seahorse Hearts" and a HUGE "Seahorse Lentil"! So amazing! 

Did you see my BANNER?! YAY!!! I am so happy with it! Looks like I got the 6ft one instead! Lol. 

Well that about does the post for today! I am so looking forward to seeing and meeting you all at Bead Fest!
xo Genea

Sunday, July 14, 2013

Opals Struck in the Clouds- Working Creation is Messy Opal Glasses Tips & Tricks


Hello friends!

I have some new discoveries to share with you. I am always amazed at just how much I learn every time I sit down at the torch. It's also amazing how much things can change from each time I sit down. Things that may have worked from the last session may not work in the next session due to slight changes in your environment. 

So what is today's topic? Creation is Messy opal glasses. You know those amazing translucent watery opals that only Creation is Messy makes. 
Here are some of the glasses about which I am talking. I just LOVE their watery, oceany blue and green opals! 

So how do you work theses amazing glasses? How do you keep them clear or get them to be "cloudy"? 
When working with these glasses you may have had some of these results. In the photo from left to right: CiM Atlantis unstruck, CiM Atlantis struck, and CiM Kryptonite "partially cloudy" (partially struck). So what you may also have noticed is that some colors are more finicky than others. For instance Atlantis, is definitely one of those colors. 

So let's take a look at the rods first. 
Here are two different batches of CiM Atlantis. The rod on the bottom is from an older batch I had and the rod on the top is from a newer batch I have received. As you may notice the top rod is a bit more "cloudy" looking and not as translucent. It looks similar to the Wing Ding pictured above that has been "struck". 

It was brought to my attention by Kathy of CiM that the rods in the entire run of glass from the pot can be different from the rods that are pulled first to the rods that are pulled last. Did you know that there are so many variables in glass that can change the color? Even slight changes in humidity can effect the glasses hue. Crazy huh? It's a wonder anyone can get each batch of glass to turn out the same! 

 If you have ever had the good fortune of hand picking your glass you will notice that when you look in the box of glass you can see a difference in color across the large box. So that being said, when you place an order in which your glass picked for you, you may receive rods that were the first to be pulled or last to be pulled causing a different color or opacity. So when ordering your glass you may want to specifically ask for certain characteristics in your glass. This is just something I have learned from ordering so that is my little tip to pass down to you ;)

In my experience the rods that look the most translucent seem to stay that color. Rods that look slightly more cloudy seem to strike cloudy more easily. 

So the next thing to address is torch working environment and kiln temperature. Below are the "settings" I use in my working environment that have worked for me. 

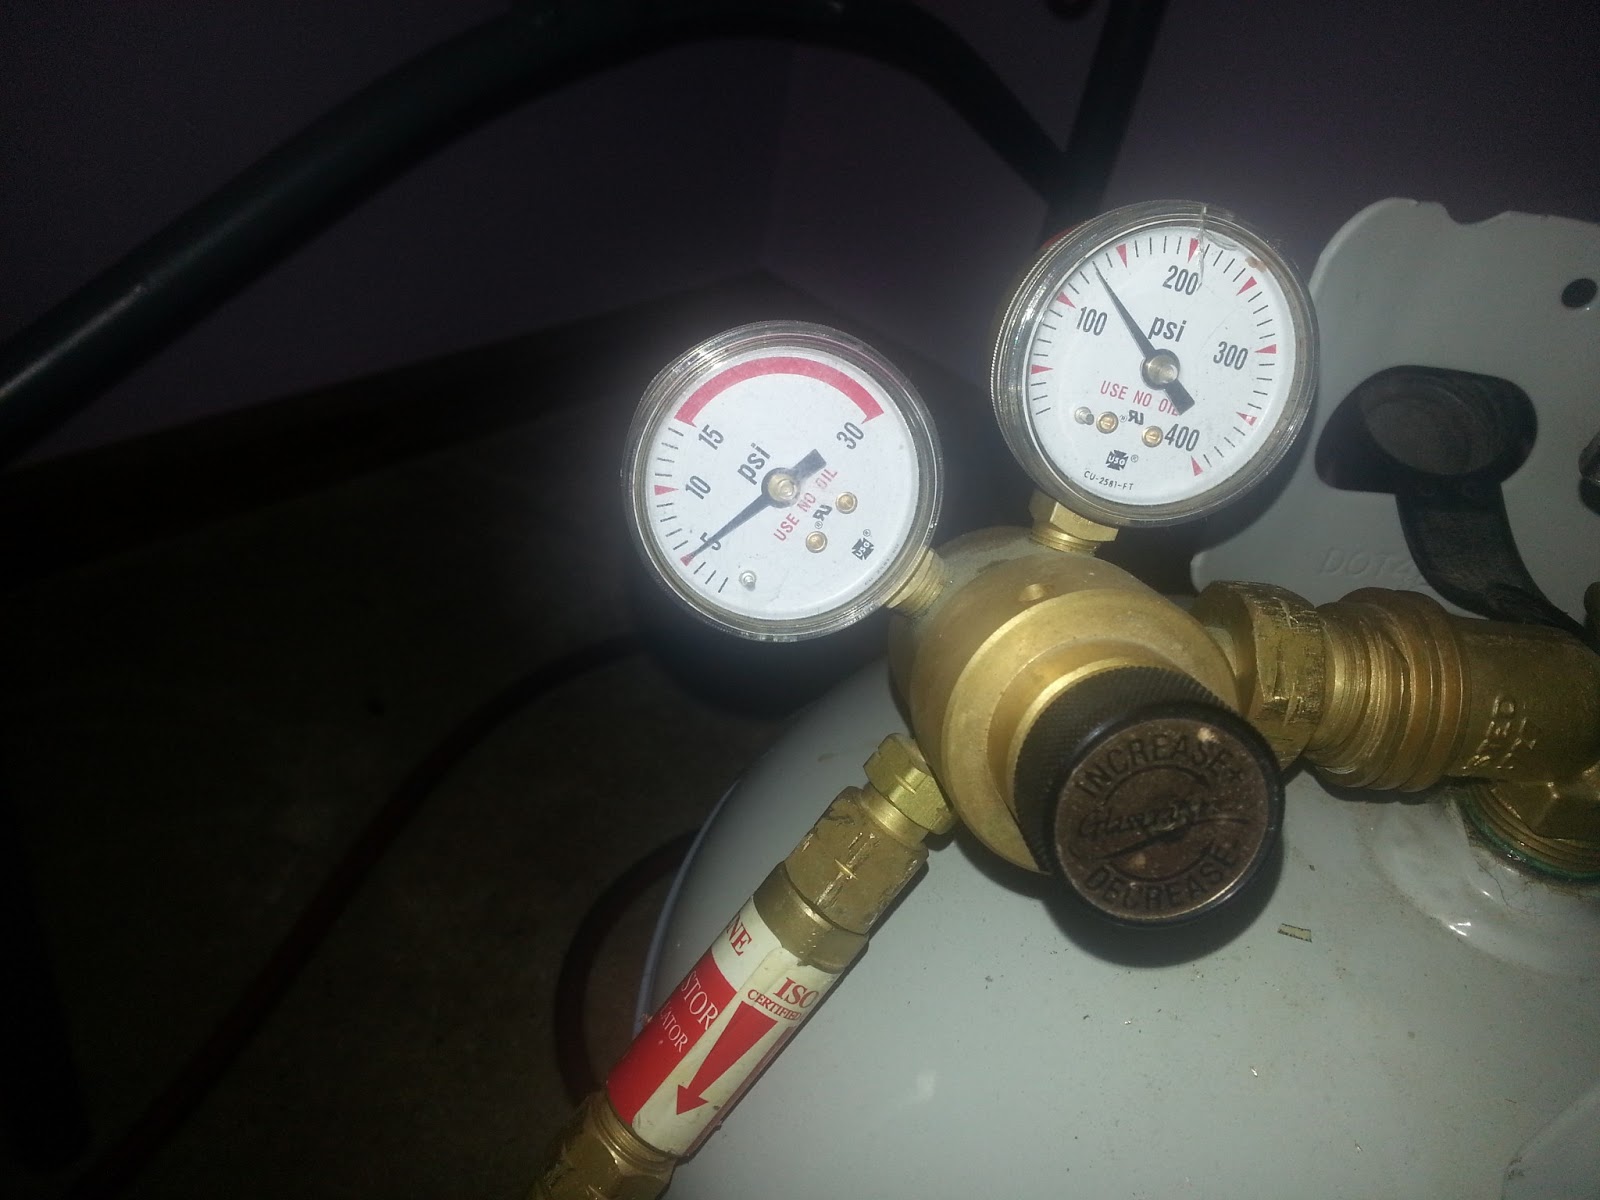
It seems that you want to keep your propane at 5. Higher or lower seem to effect the colors for me.

I also keep my oxygen knob open so that I am at the max amount for my concentrator as well keeping it right at the point of that little arrow.


I work my glass in a slightly oxidizing flame. As you can see it looks narrow like this. 
I work my glass about here in the flame. You want to be slightly above the normal working area for other glasses. You want to try to keep the glass cooler when you work it. 

When working the glass if you give it a lot of direct high heat it will strike cloudy. If you want your glass to stay more opal you want to keep the heat even while working on your bead.  Heating and cooling the glass multiple times will also strike the glass. If you want to shape your glass in a mold or with tools you will want to keep the pressing or shaping to a minimum as well. So for pressing your beads you will want to try to give the bead one good press if possible. 

The other thing I have noticed when working the glass is my kilns temperature. 

I have a kiln from The Glass Hive. My annealing program is set to anneal at 950. 

It seems to me that my kiln is hotter towards the controller box than it is on the far right side. I am not sure if it's supposed to be this way, but this is just my guess. 

Normally I stagger my beads like this having one bead go over the top of my rest and the next bead go under the rest. When making my opal wing dings I noticed that this staggering actually STRUCK my glass from the KILN DOOR OPENING AND CLOSING! The rush of cool air from opening the kiln door along with the hot temps of the inside of the kiln cause the glass to strike and become "cloudy". This is the very same thing that happens in your flame from  heating and cooling the glass!  Ugh! *Derp* I guess that would make sense! So with that in mind the beads really need to be as far inside the kiln as possible so that the temperature around them stays even.

I have also noticed that putting my beads in the kiln on the far right in the inner most part of the kiln keeps them more opaly. So really my "safe zone" for opal glasses is like 3/4 of the way into the kiln and all the way to the right. The closer I get to the middle the more I have had things strike. So the other tip I will do for very finicky colors like Atlantis is to wait to work those colors at the end of my lampworking session. I will put those beads on the far right in the inner most part of the kiln. The idea behind working them last is that they will have less kiln door opening and closing on them than the rest of the beads to avoid striking. I didn't have a photo of the "safe zone", but you can kind of tell where that is based on where your kiln doors close ;) 

So is this a "fail safe" method? Unfortunately, no. Rods also have a role to play in whether you will have opacity problems or not, BUT these little tips may help to yield better results. 

I hope that my findings will help you when working these amazing glasses :)

xo Genea

Saturday, July 6, 2013

Pickling Lampwork Glass for Crystal Clear Rods

Hello friends!

Today I want to talk with you about pickling glass. Yep, you can pickle glass just like you can pickle metal! Cool huh? So why do we want to pickle glass, you ask? Well, I'm sure in your lampworking career you have had your fair share of scummy disgusting rods. As you know our glass travels a long way before it gets to our studio. It is pulled in glass factories, shipped to distributors, and stocked in boxes on shelves before it gets packed into a box and shipped to our studios. You can imagine the layers of dust, dirt, and grime that can get from it's travels along with the gooey oils from your skin. Now think of melting that dirty oily glass and how pretty that will look if not cleaned. 

So normally you would just wipe down your rods with a clean cloth and glass cleaner or alcohol, right? Well lets do one better and pickle that glass to get it sparkling clean!

None of these tutorials are my own so I will link you up to the ones I have followed and fill you in on how I followed them. So lets take a look at some glass to see the results.
For this example I have used one of my favorite clear glasses, Clear by Creation is Messy. Their clear is VERY compatible with just about every type of 104 glass out there. I have had little to no problems with cracking so it's my go-to clear.

From left to right: Pickled clear, gently worked untreated clear, and just burn the snot out of it and work it hot untreated clear. 

Wow! Look at the difference huh?! Pickling makes a HUGE difference in clarity for sure! You will still need to wipe down your rods with a CLEAN cloth and either window cleaner or alcohol before using because even thought the rods have the grime cleaned off of them the oils on your skin will still make the glass scuzzy if you don't use clean rods.

I used Pat Frantz' tutorial on glass pickling which can be found here

BUT.. there were a few things that weren't super specific so I will tell you how I did it. So first you are told to use the pickle according to the box instructions, but use it half strength. If I would have had my postal scale I may have weighed out the amount of pickle in one of those metal beading triangles to get the right amount. Unfortunately when I did this I didn't have a scale. I used a wooden spoon and used 2 large scoops for the pickle. I filled up my baking dish as full as I could get it making sure to leave room for the glass. 

I don't know about you, but I am not really sure how hot, hot coffee is. So what my hubby told me is that you just pretty much want to keep the pickle solution from boiling. The double burner I used was kinda funny with temperature so you kinda had to guess. So that being said you want to keep the heat low to medium. You will have a few little fizzy looking bubbles doing it this way and that seemed to work fine. This will make more sense when you set up your pickling solution. 

The other thing that was not touched on was disposal. So here is an excellent article I found on the Metal Studio Workbook blog telling you more about pickle and how to dispose of it.

While going through a most excellent Pinterest board of gorgeous lampwork beads I also came across Ising Glass Designs blog. She used a natural pickle and seemed to have the same awesome results. You can read more about her experiences on her blog. Personally I would have liked to use the natural method as I hate nasty chemicals. It's nice to know you can still get the same results which ever way you choose!

I hope this helps you with your scummy glass problems. I know I am super stoked to get those normally streaky scummy rods crystal clear! 

Happy Lampworking!

xo Genea

Saturday, June 22, 2013

NEW DESIGNS and a shop update! Introducing "Rainbow Serpent Coins" !

Hello friends!

Well never a dull moment, and with the show RIGHT around the corner things are getting even more intense!  I have been just plugging away making beads in the studio and trying to stay cool in the HOT and HUMID Missouri/Kansas Summer. 

I posted a video from my phone of a storm that rolled into Olathe the other week and was so pleased with the video quality and upload ease I did a few lampwork videos too! I thought heck why not, right?! I will just post the link to my business page since they take awhile to upload on each site and for some reason youtube didn't recognize the video format. 

I am super STOKED about my new Sea Urchin designs. I honestly put one of the stamps aside because I didn't think it would work up into a design. Well luckily this new one worked perfectly! 

Here is the "quick view" of what is new in the shop if you don't want to read past here.

I just love these photo collages. They make everything so pretty and give you that great way to see everything all at once :D


"Painted Desert Pods" pair. I had made these awhile back and just never got back to them until now. Staci created these beautiful earrings below and that kinda lit the fire under my butt to make some more ;)
So pretty! I just love our beads together! 
Rainbow Serpent Stick "Ivory Rainbow". Wow! Just look at all of the amazing colors on this baby with all of that curdled and webbed ivory goodness! 
And if the front wasn't already amazing enough, this is the back side! :D
Rainbow Serpent Stick "Teal Tide". You know how I love my collections of beads to match everything ;) This is no exception. The back side has a pretty stripey rainbow like the other serpent sticks. 


Rainbow Serpent Coins "Ivory".(One) Lots of gorgeous color variation on these! Nice soft pastels on one side and vivid, orangey, golden, pinky, violet on the other side! So pretty on that ivory base.

Rainbow Serpent Coins "Midnight Rainbow".(One) Um holy YUM! Don't you just LOVE that high contrast of vivid color against the black? These even have that lighter side as well, but more minty greens with a splash of pale pink and some yellow. 

Here are some GORGEOUS reversible earrings I created with some other beautiful art components: Black Raven Canoe beads by Starry Road studio, Color drenched hoops by Miss Fickle Media, and Copper bright patinated Urchin Sticks by Kristi Bowman Design.

Thanks for stopping by this weekend!

See you soon!

xo Genea

Friday, June 7, 2013

NEW Designs, A SALE, AND A GIVEAWAY FOR MY OCEAN URCHIN EGG FOCAL!

Hello friends!

I feel like I am running a marathon. I have been bouncing all over the web today, from my Etsy shop, in groups to promote, Pinterest,  in Etsy teams to promote, and finally HERE to tell you the news if you have not seen it else where yet! 

New listings plus a sale and giveaway! SALE AND GIVEAWAY FOR A SEA URCHIN FOCAL! Use coupon code "yay4beads15" at check out to receive 15% OFF! Every $10 spent gives you an entry to win! Sale ends Saturday at Midnight!


To show size. WOW, huh?! :D


To show size. WOW, huh?! :D


To show front and back details.


Thanks for stopping by! I hope you LOVE the new designs and I hope you found something you couldn't live without!

xo Genea

Sunday, June 2, 2013

Bead Fest Philly August 23-25th 2013- Genea Beads & S L Artisan Accents!

Hello friends!

OMG, OMG, OMG! It's ALMOST here! Can you believe it?! I just received the info from Dana Groves(our event sales manager. Who is amazing, btw!)! So here is some quick info for you. Now I personally have not been to or vended at a bead show this large before, so I am SUPER EXCITED! Can you imagine this bead show is SO big that they have a map like this and you may actually get lost and not be able to find us without this information??!

So here it is! Staci and I are at booth 371 over by Artisan Alley. You can view the entire Bead Fest Map here.
I would hope by now that from our blogs you would know what Staci and my work look like, but here is a quick collage of some newer work ;)
  We will be sharing a corner with our friends, Karen Totten of Starry Road Studio and her daughter Nellie Thomas of Spin-Culture! Yay!! Oh and our across the way neighbors will be Patti Cahill of Dyed in the Fire Designs and Joan Miller Porcelain! Wow! Did we luck out being surrounded by some amazing artists, or what?! :D

So what other news do I have for you? Well how would you like to save $10 on your ticket entrance to Bead Fest?! Just print out the coupon below and bring it in for your discount! That makes your entrance fee only $5! Just think of all of the wonderful beds you can buy with that extra $10! You're welcome! :D

So come and be our guest! Are you singing the "Be our Guest" song on Beauty and the Beast now? LOL I am. Well in my head at least! 

For any more info you may need you can check out the Bead Fest Philly August 2013 page!

Thanks for stopping by! Can't wait to see you there!!

xo Genea