Third Eye Gypsy(Genea Beads) 2011 by Parigo Studios 2010

Tuesday, January 24, 2012

Meet Heather Powers, my BSBP Winter 2012 Partner!

Hello friends!

I would like to introduce you to my Bead Soup Blog Partner,  Heather Powers. You may know her from a number of wonderful places as she is a huge force in the bead world. You may recognize her from her shop Humble Beads or perhaps from The Art Bead Scene Blog. You can read more about Heather and what inspires her in her bio.

Here are some of her works you may recognize as well! I just picked a few from her www.humblebeads.com site to share with you here :)

Here are some beads from her "Art Inspired" section. I just love all of the colors and lines in this set.

She even does cute little woodland creatures like her "baby hedgies" . I am particularly in love with these just because I used to own a couple of hedge hogs. They really are such remarkable little creatures!

and I am totally blown away by this style bead she does called "Wishes and Starfishes". I am totally amazed by the techniques being done with polymer clay these days. When I was into polymer clay at age 15 it was all about cane work pieces. I really love the wonderful painterly style of these beads. They are like tiny little 3 dimensional canvas'. They have wonderful raised textures along with hand painted on colors. Wow! 

I was so excited to get picked to be partners with Heather. She is so creative and I just admire her incredible skill in clay! I can't wait to see which of her treasures she sends to me in my soup!

Here is a little teaser image of the soup that is in the mail on it's way to her as we speak!


See you soon!
xo Genea


Monday, January 23, 2012

NEWS and a SALE!

Hello friends!

Well I finally have some news for you. I've been lying low for awhile so you haven't read all of the things going on in my life at the moment. Who wants to read about all of that crap all the time anyways? :( So first off I will tell the news as I have just posted about it on Facebook.


I will be going back home to Kansas City for a few months due to some family things. I just need to be home with my mom.  I know that's pretty vague, but the full details aren't mine to share so that will have to suffice.  I will be staying with mom for a little while while Ricky stays in Portland. So I guess that is about as much as I can tell for now. 
Ok so we aren't really going by wagon, but I couldn't help but add a pic of Oregon Trail into my blog for some comic relief.  We will actually be traveling by car. 

I will be taking myself and the dogs to KC so I need to drive back since it's too cold to fly all of us and probably just about as expensive. We are leaving on the 28th of this month! I am thankfully traveling with my friend, Holly from Kansas City! I am looking forward to our girl cross country road trip. I'm hoping not to hit some bad weather as we pass over the mountains. KC really hasn't gotten hammered with crazy wintery weather yet much this year so I am hoping it will hold off until I make it home safely.


THE SALE...

So where is the sale info on this thing?! Ok well here we go. Traveling costs have SKY ROCKETED so to help with traveling costs I am having a sale! Who doesn't love a sale?! So from now through Tuesday at midnight I am offering 30% OFF STORE WIDE with the coupon code "TRAVELKC". Enter this code at check out for the discount to be applied!

Thanks for checking up on me! See you soon!
xo Genea


Thursday, January 19, 2012

More Jewels from the desert- Shop Update

Hello friends!

I suppose you are wondering why there hasn't been more content on my blog recently other than shop updates. Well the reality isn't so amazing so I've been keeping it off of here. I do have some news I will be sharing early next week, but until then I will just get to my shop updates. They really are the bright spot in my day :)

So a few more goodies in the Desert/Midnight theme and a little twist...
"Desert Serpent" these are back in the shop! I just LOVE this style I created. So natural with a burst of rainbowy goodness.  I would have liked to have made more especially some in a focal size, but I ran out of IVORY. Wa, wa, wa...


"Onyx Rainbow Sands" a little sampling of everything awesome in the way of this deserty theme. 

"Painted Desert Pods" maybe you remember seeing a few of these that I sent to Staci of Artisan Accents for our swap. Well now how about some for EVERYONE?! :D

Tornado Candy Ruffle Button "Midnight Jewel"- so you remember that new focal kick I got on? How about these colors?! I originally made this to match these mash up sets and the headpins(they sold, but I'll be making more ;)
 
Desert Serpent "Just Rust"- so you all know how I LOVE red roof tile, right? Well I figured I would give this style I came up with a try on it. WOW! Aren't these awesome? So why aren't there more matching beads to go with these?(I ran out of this color too! More on the way though ;)
I even named these beads after a Fiona Apple song .

Well that concludes my update for now. We actually had a snow day here in Portland the other day. Ricky and I ventured out and took some photos. I will get those edited and up here in a few days :D

See ya soon!

xo Genea

Thursday, January 12, 2012

Metamorphosis of Design "Tornado Candies" and Shop Update!

Hello friends!

Do you remember me talking about these beads? I kinda got off on a tangent after creating them and created my first FREE tutorials(on my left side blog bar) with one of the focal beads. I got all of these babies photographed inbetween passing clouds the other day. Just got them all edited and up in the shop today. 

So before moving along to the listings I want to talk with you about the designs. You know how I am about the process :D So I guess I just kinda kept going with the lime greens, teals and aquas. I did that run of Vortex Flowers and it was just easy to keep working in the same colors.


I decided to SUPER SIZE my "Tornado Candy" design. This came about when I did my trade with Staci Klinger Smith from Staci Louise Originals. When we did our trade she had asked if I did the "Desert Serpent" style beads in a focal size. Hmmm.. no I didn't, but sure could! I was really pleased with the results so I decided to do the same with the "Tornado Candy" style.
As I create I kinda get side tracked sometimes. I keep getting ideas like "Hey, what if I did that? or What if I add this"? So that is EXACTLY what I did!

Here are the focals. They are kind of in the order they were created except the transparent daisy topped one was the last one.  So the large Tornado Candy was first, then how about a ruffle? OOoo pretty! How about a ruffle and a bubble button? SWEET! How about a daisy?! Maybe opaque and transparent?  Hmmm... kinda cool, but the transparent rakes on top(which you cant see) didn't quite turn out right. Ummmmm FRIT, YES FRIT. Oooo schweet! It kinda looks like tye-dye! Oh, what if I did ALL transparent?? SUH-WHEET! It's so SHINY!
So there they were. I had them sitting on my bead table when I made that tutorial for Holly so I just scooped up one of them and made the finished piece.

So inbetween there, I just made a TON of these little "Dizzy Daisy Discs". They work up pretty fast and they are so pretty. Instead of creasing them all the way down to the bead hole, they are only creased through the outer transparent layer leaving a spiral disc in tact for the middle.


Well you know me, I just can't leave things simple, so I had to make some "Tornado Pods" too. Especially after making the swirl pods. I used transparents this time. They are really pretty except you can see the whole headpin wire through them. You can't really tell that I used the yellow green and pale aqua inside 2 of them since they are SO pale, but they are there!
Pretty sweet eh?! So I suppose you want some links huh? ;)
NEW IN THE SHOP....


I hope you enjoyed reading about the story behind these beads.

Have a fantastic rest of the week!

xo Genea


Friday, January 6, 2012

Wire-Wrapped Spiral Bail Dangles Tutorial(Part 2)

Hello friends!

After some consideration I decided to create Part 2 of the "Wire-Wrapped Spiral Bail" tutorial!

Through this process I also decided to offer a kit as well so that you can complete your very own "Tornado Candy Ruffle" pendant/necklace!

Just a quick note on the tutorial. I didn't have a tripod so in some photos where you will need both hands I had to picture the plyers just displayed with the instruction. ;)


Wire-Wrapped Spiral Bail Dangles

Supplies 

Supplies for part 1
1 ruler
19 gauge dark annealed steel wire
A pen of any kind(think of how large you would like the hole of your bail to be)
Round nosed plyers
Nylon Jaw Flat nosed plyers(photo shows regular flat nosed)
Chain nose plyer(optional)(not pictured)
Cutter
2- gun metal 3mm round beads(not pictured)
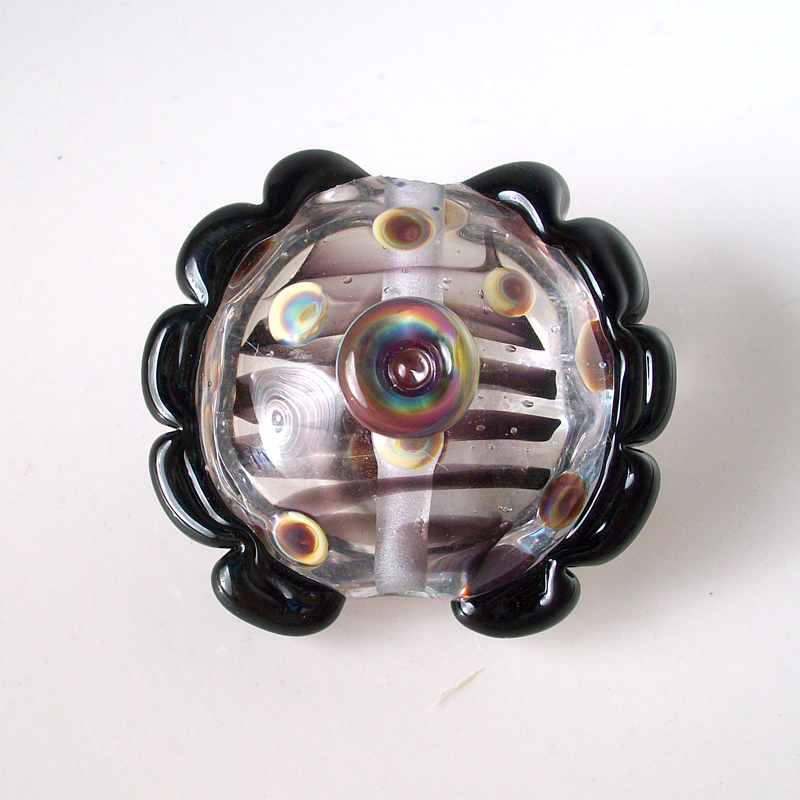
Genea Beads-"Tornado Candy Ruffle"  focal(not pictured)


Supplies for Part 2 
Ruler
Round nosed plyers
Flat nosed plyers
(or 2 sets of plyers for opening jump rings)
Bent chain nosed plyers
Cutter
"Tornado Candy Ruffle" Kit 
OR
"Tornado Candy Ruffle" lentil focal-28mm w/ 3/32 bead hole
"Spiral pod" glass headpin-15mm tall by 7mm across on 22 ga dark annealed steel wire 5"(not including glass pin)
"Swirly Spacer" 7mm w/ 1/16th bead hole
"Swirly Ruffle Daisy Disc" 18mm w/ 1/16th bead hole
18-20" black adjustable necklace cord
4-mini leather crimps
4-4mm aluminum jump rings
3-7mm aluminum jump rings
1 1/4" of electroplated gun metal chain
3-3mm round gun metal beads
2-Chameleon 6mm rubber o's
1-Sky 6mm rubber o
1- Light Grass Green 6mm rubber o
1- New Sky 10mm rubber o
2- 2" .05 turquoise leather
1- 1 Ft. 19gauge dark annealed steel wire
dry cloth or paper towel (optional)
First grasp your already made bail loops in one hand and firmly hold. Grab your bent chain nosed plyers and grasp the bottom loop. Turn the loop sideways. 

Pick up your 7mm jump ring and open the jump ring side to side with your flat nosed and bent curved nosed plyers. Sorry for the fuzzy photo, this was so hard to do w/ no extra hands to photograph.
Attach your 7mm jump ring do the bottom bail loop.


Slide on 10mm New Sky rubber O. Grasp the jump ring with your flat nosed and bent chain nosed plyers and close the jump ring by moving your plyers side to side again to close the ring.

Take another 7mm jump ring and add it to the bottom of the 10mm New Sky rubber o and close the jump ring.

Take a 4mm jump ring, open it and attach it to the center of the bottom bail loop, adding the length of gun metal chain. Close jump ring.
These pins do leave a bit of black behind so you can put the pin in a  dry cloth or paper towel and run it through a few times to remove some of the black. Pick up your "Spiral Pod" glass headpin and with your round nosed plyers grip the wire a little space above the glass bottom.
Bend the wire at a 45 degree angle.


Push the wire over the top of the plyers.

Adjust your plyers so they lie flat and push the wire back to complete the wire-wrapped loop.

Attach the "Spiral Pod" glass headpin to the bottom of the 7mm jump ring.

With your round nosed plyers grasp across the loop you made(not through it) and wire wrap down until you touch the top of the glass headpin.
Now wire wrap the wire back to the top where the loop you made is.

**This part was a bit harder with the steel wire since it's quite a bit stiffer than other metals. You can skip this part if you wish and continue back up and down the lengh of wire wraps making a "messy style" wrap.**
With your hands thread the wire back through the jump ring to make a double loop for the "Spiral Pod" dangle.
If you get a bit of black from the wire on the rubber o, you can wipe it off with a damp cloth.

Pull the wire tightly to make the second loop the same size as the first. You may use plyers to help you along if it is easier.

Grasp both wire loops with your round nosed plyers and wire wrap down to the top of the glass headpin.

Now coil the wire around wider to fit the base of the glass headpin.
Cut off the excess wire.

Take your bent chain nosed plyers and "tuck" the end of the wire wrap.

Pick up your "Spiral Ruffle Daisy Disc" and slide a length of leather through the bead hole. Center the leather.

Fold up the two ends of leather into a mini leather crimp. You will hold the leather pieces in the crimp with hole end of the crimp. Leather will stick out of the crimp on top. **When placing the leather in the crimp you want to make sure not to place the crimp too close to the top of the daisy so that it may move freely in the loop you create.**

With your other hand you can fold the crimp into a "tee-pee" or triangle shape(where each crimp side folds up and touches in the center.**(I give a second fold over crimp technique below if you prefer one over the other. Skim down to the addition of the spiral spacer part to see the other technique.)**
In this photo you can see the leather sticking out of the top of the crimp as explained in a few steps earlier. Your other hand will actually be holding this part as you take the bent chain nosed plyers in the other hand and squeeze the crimp flat.

Take your cutters and snip the excess wire that sticks out of the top.

Take one of your Chameleon 6mm rubber o's and slide it over the crimp and onto the leather.

Pick up a 4mm jump ring and slide it through the crimp hole.

Attach the daisy to the bottom of the gunmetal chain and close the jump ring.
Pick up your "Swirly Spacer" and slide a 2" length of leather through the hole. Center the leather.

Fold up both ends of leather in the mini crimp.

**This is the other way to crimp the mini crimp as mentioned above.** With your bent chain nosed plyers fold over one side of the crimp.

Fold over the other side of the crimp on top of the first part and squeeze flat.

Trim excess leather that sticks out of the top.
Take your Sky 6mm rubber o and string it over the crimp and onto the leather.

Finish stringing on other 6mm rubber o's, Chameleon, and light grass green.

Open your last 4mm jump ring and put it through the crimp hole and attach it to the bottom bail loop. Close jump ring.
Your "Tornado Candy Ruffle" pendant is completed! Hooray! :D Slide the pendant on the 18-20" adjustable necklace cord and wear!

Here is what the pendant looks like worn. **Colors are slightly off due to lighting. **

I hope you enjoyed these free tutorials!

Thanks so much for stopping by!
xo Genea