DON'T FORGET! Genea Beads will be doing a give-away on Deal Wise Mommy on OCTOBER 5TH! Check out her site for details on how to enter! You can also find details on her Facebook page!
If you havn't already snuk over to the shop while I was updating(since you may have noticed a pattern of me listing on Thursdays ;) now is your chance to see all of the fun new things I have added to the shop! I have just ONE set of glass headpins to offer(they won't be there long!) as the other was snatched up the second it was created. I am SUPER excited about my mixed bead and finding sets and some fun varieties of wing ding sets. You all have really been scooping up the wing dings so I wanted to make sure there were some more for your designing fun! One bright set, and a few fallish/earthy/jewely sets. This time around I have some shiny transparents for ya!
NEW IN THE SHOP.... "Wildberry"- lampwork glass droplet headpins on 24ga copper wire. As you can see there is a fantastic selection of pink and purple headpins for your designing. I try to leave the wires as long as I can so you all have lots of room to wrap, wrap WRAP those wires! Wire has been untreated to give it that antiqued tortured look.
I would suggest double wrapping the loop and doing a messy wire wrap for the most stability like the image below. If you aren't sure how to do this wrap let me know if you would like a tutorial on it. I just borrowed my friends web cam and wondered if I could get a quick video clip tutorial going to demonstrate this.
Also if you would like suggestions to change the metal color of the headpin wire let me know and I will give you a break down for different colors(really shiny or black). SPICE-"Raspberry Ink"- a super fun variety of some of my favorite beads and findings in pink, purple and lime green. Set includes: wing dings, glass head pins, flower button, ruffle flower focal, swirly spacers, rubber o's, aluminum jump rings, colored leather, and colored nylon cording!
Lots of fun shapes and findings to create something AMAZING!
Variety IS the "spice" of life, you know! A close-up of the glassy awesome! SPICE-"Cantelope Zest"-a super fun variety of some of my favorite beads and findings in coral, aqua, and lime green. Set includes: wing dings, glass head pins, flower button, ruffle flower focal, swirly spacers, rubber o's, aluminum jump rings, colored leather, and colored nylon cording!
I can't wait to see what you all come up with these fun sets and beads from your stash! Another delicious close-up :D Wing Dings- "Prism"- a delightful BRIGHT transparent and glitter selection of paddle beads! Yellow and orange are glittery(which isn't apparent in the picture)! Rainbowy goodness!
Wing Dings- "Sandy Bayou"- a lovely sampling of earthy greens and browns. Transparent, translucent and opaque.Wing Dings- "Jewels"- rich transparent jewel tones perfect for fall! Much darker than my normal bright color palette. Perfect for those of you that love this fantastic time of year with it's darker color palette :)
OMG! So were you as excited as me?! I am super stoked about today's offerings. I can't wait to see what you all create!
Speaking of creating, my package just arrived from My ELEMENTS so off I go to create myself! I am working on some more AMAZING jewelry designs for you all!
I keep forgetting that I can come talk with you were without having some huge update or a bagillion pictures ;) It just seems a whole lot more interesting when I have some eye candy to share :)
I've been busy, busy, busy doing some glass testing, making beads and glass headpins and the usual daily grind. I am excited about what I will be listing this week on Etsy. I had a burst of ideas last night after I got out of the shower. Does that happen to anyone else?
Anyways, I am one of those variety people. I love to have little bits of everything. You know, like when you go out for breakfast. I always order the plate with potatoes, biscuits and gravy, sausage, eggs and a pancake! Mmmm that sounds really good right now! So thinking about variety and my latest super asymmetrical designs I thought it might be fun to offer some listings with a fun variety! That is about as much of a hint as I will give you for now ;) Hey, I gotta keep you coming back somehow, right? ;)
I am super stoked about the cool temperatures. It has been so chilly at night I get to sleep under a comforter, quilt, and smaller micro fleece blanket. Ahhhhh! I love being all snuggled up in my bed with it being cold outside :D I'm still waiting for the leaves to turn. This cooler weather hasn't been going on long enough to see the colors in the trees yet. I am hoping to take some pictures this year. I really had wished I would have gotten some taken while I lived in Colorado. There were tons of those yellow/orange trees around and it was SOOOO pretty to see all of the leaves changing :)
Well I am absolutely famished after my lampworking session this early afternoon so I believe some lunch is in order!
I can't wait to go hang out with the lampwork ladies tonight at Cinzettis!
I hope you are enjoying a most wonderous fall day today!
I'm SOOOO excited to share my new designs with you! As you know it's ALL about color! These new designs are packed full! Just a little bit of metals for connectors and findings and the rest is pure unadultered COLOR! Woot!
What inspired these fun new designs besides having color from which to choose? Well I would most definitely say the colored leather and the Rubber O's I purchased from Yvonne at My ELEMENTS. Yvonne is unfortunately running dial up for her internet service so I told her that I would go pimp out her products right here on my blog :)
The new "Flying Hula Hoop", "Flying Rubber Bumper," and "Flying Rubber Bumper Slide" designs were inspired by my "Wing Ding Waterfall" necklaces. I also got these AMAZING vintage lucite hoops that made the designing that much more fun! They are super light so earrings are a blast. You can really load them up with beads and still have them light weight enough to wear all day!
NEW IN THE SHOP.... Here is what the set looks like all together. FUN, huh?!
Colors include: Coral orange, scarlet red, yellow, fuchsia, and orchid. Flying Hula Hoop- "Blood Orange Blush" necklace- Super fun wing ding dangles, a vintage lucite hoop and swirly spacer center all on an 18-20"(45.72-50.8cm) adjustable necklace.
Flying Rubber Bumper-"Blood Orange Blush" bracelet- Wiggly and bright colored rubber rings and wing dings slide over colored leather while swirly spacers weave together with silver wire. Fun for every wrist. Bracelet is just shy of 7 1/2"(17.78cm). This bracelet fits comfortably on my 7" wrist with a little room left over for a loose fit.
Colors include: coraly peach, electric yellow green, aqua and tangerine orange. Flying Hula Hoop- "Kumquat Lime Sky" earrings- Super fun wing ding dangles, a vintage lucite hoop and swirly spacer center. Earrings dangle 2 1/2"(5.08cm). Flying Hula Hoop- "Kumquat Lime Sky" necklace- Super fun wing ding dangles, a vintage lucite hoop and swirly spacer center all on an 18-20"(45.72-50.8cm) adjustable necklace. Flying Rubber Bumper-"Kumquat Lime Sky" bracelet- Wiggly and bright colored rubber rings and wing dings slide over colored leather while swirly spacers weave together with silver wire. Fun for every wrist. Bracelet is just shy of 7 1/2"(17.78cm). This bracelet fits comfortably on my 7" wrist with a little room left over for a loose fit.
This is how the bracelet looks worn. As you can see there is only one shot of this bracelet, but I figured the other photos let you know what the rest of it looked like ;)
Colors include:scarlet red, orange, yellow, kelly green and lapis blue. Flying Hula Hoop- "Original 8" earrings- Super fun wing ding dangles, a vintage lucite hoop and swirly spacer center. Earrings dangle 2 1/2"(5.08cm). The name "Original 8" was suggested by my mom. She said the colors in this necklace reminded her of the "original 8" crayola colors :) Flying Hula Hoop- "Original 8" necklace- Super fun wing ding dangles, a vintage lucite hoop and swirly spacer center all on an 18-20"(45.72-50.8cm) adjustable necklace.
You are waiting for the bracelet that matches this listing right? Yeah... well... uh... I didn't have the right color supplies to make one so you will just have to enjoy the earrings and necklace ;) Flying Rubber Bumper Slide-"Leaf Splash" bracelet- Wiggly and bright colored rubber rings and wing dings slide over colored leather while swirly spacers weave together with silver wire. Fun for every wrist. Bracelet is 7 1/2"(17.78cm).
See the little design twist? Instead of stringing the wing dings I decided to knot them to soldered rings to make a dangle and then slide them that way! So cool! Half strung, half dangle!
Bracelet is 7 1/2"(17.78cm). This bracelet fits comfortably on my 7" wrist with a little room left over for a loose fit. This bracelet is just a tad longer that the other "Flying Rubber Bumper" bracelets. Additional jump rings may be added at clasp to lengthen bracelet upon request.
Well I hope that you enjoyed checking out the new designs! I had SO much fun creating them!
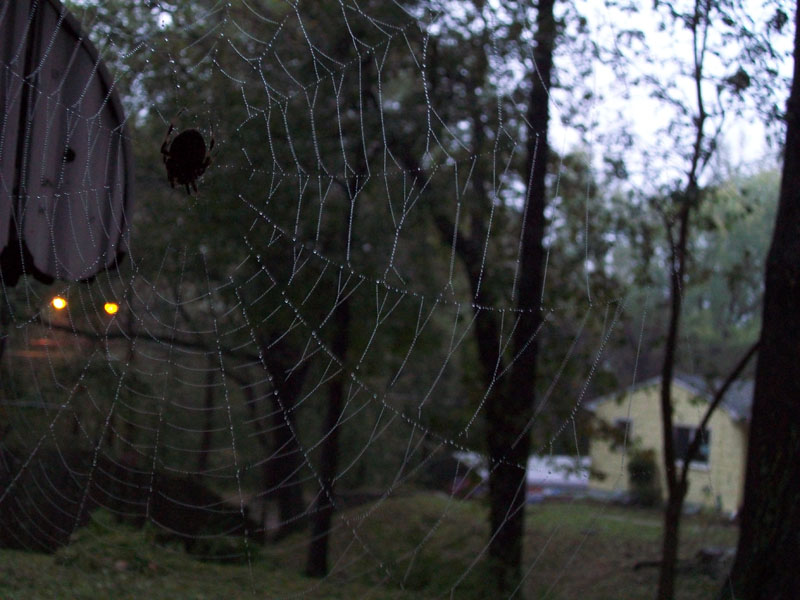
I don't know if your neck of the woods got wicked storms like we did here in Kansas City, Missouri. Here are some photos I took after the storm. These were taken at about 6am after the power finally came back on.This was the first thing I saw on my way out my front door. I took this photo with the flash. I wish my camera could have caught the detail I saw with my eyes. Here is the same picture without the flash. You can see the dew on the web a little better in this picture. It was so beautiful! I am NEVER up early enough to see things like this. I just see the spiders at night when they are weaving their webs at dusk. They are usually gone in the morning. By the time I wake up around 10am the webs are pulled down and the spiders are gone for the day.
You can see a much more beautiful spider web picture taken by Andrea Guarino-Slemmons on her blog. She is doing a picture a day post that I am really enjoying :) As you can see she has a MUCH nicer camera than myself ;) Here is my front porch. You can see the shredded up leaves in this picture. This is what the house looked like as well. There was a micro burst in our area so everything was covered in leaves like this.
Here is a picture of the ground. Again you can see it's covered in leaves. There was also hail. My feet were cold walking through the wet grass as I took photos. It was weird. Almost like winter with the trees looking bare after having all of their leaves ripped off. On the left side of the house you can see this tree that split in half and fell. The larger tree that you see to the right also dropped a huge limb into the neighbors fence next to us. Luckily their fence was still standing and there was no damage to the house.
Right now my backyard is literally COVERED in branches. I called the city today to see if they were doing a special pick-up in my area from storm damage. They woman told me that I wasn't in the "covered" area. Really? WTF? Did she not know that I was in the area that got hit with the micro burst? The gas station sign and Sonic signs were ripped from their signs by the street. Pretty crazy!
I will take some more pictures of the yard before we get all of the branches picked up. I can't believe how crazy the weather was! Nature has SOME fury!
Wow! You all are AMAZING! What a fantastic day in the shop! 4 of the 6 items I had just listed were out of the shop before I had a chance to blog about them! Thanks for everything! You all allow me to keep doing what I do and I am super grateful!
Want to see what we have left?
NEW IN THE SHOP.... "I Love Coffee"- This darling Ode to coffee is on a base of one of my favorite odd lot peachy corals with yellow ocher dots. On the front is an aqua coffee mug with delicious coffee inside. Perfect for all of your coffee lover's out there! "Morning Cup"- The way I love to start my morning! A hot cup of brown coffee in a cute turquoise mug with yellow ocher spots. The chemical reaction between the yellow and blue cause the dark outline around the dots. Super fun!
"Coffee Beans"- Ah the things that make that golden cup all possible! Beautiful red brown coffee beans. This fun little set of 3 would make delightful earrings and a pendant or great additions to a coffee themed project.
WHAT ELSE IS NEW?... You may have seen my most recent offering of glass head pins. I thought you might want to see how they were made. Well sort of. You get to see the beginning and end, but not the middle. I don't have a way to record video for you. I only get 5 minutes of recording time on my digital camera and would have to find some way to rig it up for your to view. I wrap some wire around the mandrels, heat glass onto the end and then decorate! Cool huh? This becomes... This! Fear not! These babies flew out of the shop, but I will be making more! I just LOVE to design with them! I got some more wire today from the bead shop to make more headpins.
These little babies are great for dangly drops or even teensy earrings with just one droppy glass hanging from an earwire! Oh the possibilities are endless....
I did have a suggestion to make some more coffee beads. If you all are interested let me know and I would be happy to make another run of fun coffee sets!
I have been reading Kari Chapin's book- The Handmade Market Place and in the book it brought up the subject of earrings. Apparently some people are very offended by pictures of people wearing the earrings and the cleanliness of the earrings they are purchasing. I was pretty surprised by the reactions.
What do you think? Are you put off by earrings that are modeled by a person when purchasing on Etsy or other handmade sites?
Personally I HATE seeing this modeled on mannequins or styrofoam heads. I would much rather see the item on a person. I think it gives them more life. On the heads and mannequins things look lifeless to me.
Would you rather see the earrings modeled on a stand instead of being worn? Personally I like both pictures. I want to know what the earrings would look like in my ears and see what they look like all by themselves.
Are you afraid or offended by "ear cooties", by this I mean that if the earrings were tried on would you not buy them? Personally I am not weirded out by ears. There are far worse "dirty" things like people that don't wash their hands after using the restroom and touching things ;)
Would you all please let me know what you think? If you aren't comfortable posting in the comments would you e-mail me with your thoughts? eyedoglass at hotmail dot com.
I'm following your lead. I have noticed on my google analytics that I am getting referrals from you having your blog list on your side bar! Thanks for your support!
I was so excited about what I got in the mail on Saturday I had to share before heading off to the studio.
As you know with me, it's all about COLOR! So pretty much wherever I can I like to sneak it in in place of where you would use metal. C-lon cording was my first love, but look at this WOW! Kudos to this manufacturer for making BRIGHT colored cording! So what's one of the amazing things about this stuff? THIS! Can you believe it?! This cord is so small it fits through the 1/16th bead hole DOUBLED! That is pretty darned small! To give you a better size chart the 1/16th bead hole fits a 2mm round bead to plug it up.
I have already been designing some fun things with my new colors and you can expect to see them soon.
I am so excited about all of the fun colored things that are now available out there! You know what the crazy thing is? A good majority of it is VINTAGE! Can you believe that? Yep, stuff from the 50's-70's! My ELEMENTS on Etsy has some AMAZING colored chain , rubber O's, and look at these crazy RETRO items! This stuff is RIGHT up my alley! I found her stuff awhile back when I was flipping through a beading magazine back when I worked up at the bead store. Pretty sweet!
Well off to make some breakfast before heading down to the studio!
I must be a glutton for punishment! Here I am hours later back at the computer again blogging to you after 3 LONG hours of listing on Etsy. 3 hours, can you believe it?! Wow! Well I am back for a few reasons- 1. I am feeling more human now than I have felt in a few days being sick and all. 2. I am so excited about my new designs I couldn't wait until tomorrow. 3. Since the hubby decided to go to bed early I'm not cutting out on our time together so I don't have to feel bad about sneaking away to my studio to blog :D
Well if you managed to head over to my shop before reading this you may have noticed I got a little WORDY on my descriptions. I felt kinda bad that there was SO much text, but there are SOOOOO many details on these pieces I felt obligated to do my best to describe them in words as well as pictures. So I will be keeping the descriptions a little shorter here to make up for it ;)
NEW IN THE SHOP.....
This new series of jewelry was inspired by my very FAVORITE summer coffee, Gazebo Blend brought to us by Starbucks. I was inspired by a paper card that came with the coffee, I believe last year. I loved the floral designs and color palette so I used that as inspiration for my beads and colore scheme."Gazebo Cafe"- Here it is!! This is my very FIRST mixed-media piece of jewelry and the inspiration for all of the other designs! I used the original paper card to make soldered charms that you see on the left side of the necklace. On the back side of the soldered charm is matching scrapbook paper.
I also recycled scrabble tiles and turned them into soldered charms that spell "Cafe". I had wanted to spell "Coffee", but the design worked much better by using only 4 letter tiles so that I could use more beads on the necklace.
I also made some new glass headpins! You can see them on the right side where "Cafe" is spelled.
As you can see the design is totally asymmetrical and I used the following beading techniques: stringing, wire-wrapping, and knotting. Necklace measures 19 1/2-20"(48.26-50.8 cm)adjustable.Here is a close-up of the "Cafe" tiles. Close-up of the soldered charms. Some of the collection all worn together in a set. Isn't it beautiful all together?! The jewelry is very comfortable and has a wonderful weight to it. Not heavy at all for the amount of beads on it! Especially the earrings! :D
"Gazebo Garden"- Upcycled from the original coffee card, I made soldered charms. Accents include my handmade glass drop dotted headpins, knotted colored leather with spacer beads, a strung glass bead design, dangly crystal rings and a coffee cup at the clasp! This is my FAVORITE bracelet out of the series! Bracelet measures 7 1/2"(17.78cm). Here is the back view of the bracelet.
"C" is for Coffee- What a delicious cup! Fun asymmetrical design is composed of: recycled scrabble tile "C"'s made into soldered charms, an oval glass bead(that looks like a coffee bean), Swarovski crystals, Hilltribe silver stamped spacers, and a leather loop with a spacer swinging inside! These earrings dangle 3"(7.62cm). They are surprisingly light for as many beads as are on them and very comfortable to wear! "Gazebo Botanical"- A super fun and funky lampwork bead bracelet with botanical designs based on the Gazebo card designs with brown swirls and dots on the back.
Spotty spacers are "floating" beads that slide over tiny faceted seed beads.
On the textured silver chain "floating" Hilltribe spacers create fantastic movement accented by my glass tear drop spotty headpins.
On one side spacers are knotted on colored leather with a dangly crystal ring and on the other a lampwork bead wire-wrapped with crystals brings the design back to the toggle. Bracelet measures 7 1/2"(17.78cm).
Super fun with lots of movement, color and texture! "Cup of Gazebo" reversible necklace. The original "Gazebo Blend" sticker was recycled and made into this incredible soldered pendant. On one side is a beautiful flower garden scene and on the other is a warm sun against a blue sky the words "Gazebo Blend" are inside the sun.
Dangles cascade from silver chain with: Swarovski crystals, czech glass flowers, and a spotted coffee cup. On the sides sit a brown oval coffee bean bead and a heart stamped charm.
Necklace is strung on an espresso brown adjustable necklace measuring 18-20"(45.72-50.8cm) adjustable. The back view of above necklace.
"Cup of Gazebo" earrings- 2 sweet little spotty mugs with delicious Gazebo coffee inside. Cascading down the chain are: sparkling Swarovski crystals, Czech glass flowers and a brown oval coffee bead. "Cup of Joe"- dangle ring features a spotty aqua and coral mug, a dizzy caffeinated silver spiral and a brown coffee bean bead on a size 7 sterling silver dangle ring. "Dark Roast"- sweet and simple red brown coffee beans dangle from sterling earwires. "Medium Roast"- light chocolaty brown coffee beans simple dangle from sterling silver ball ear wires.
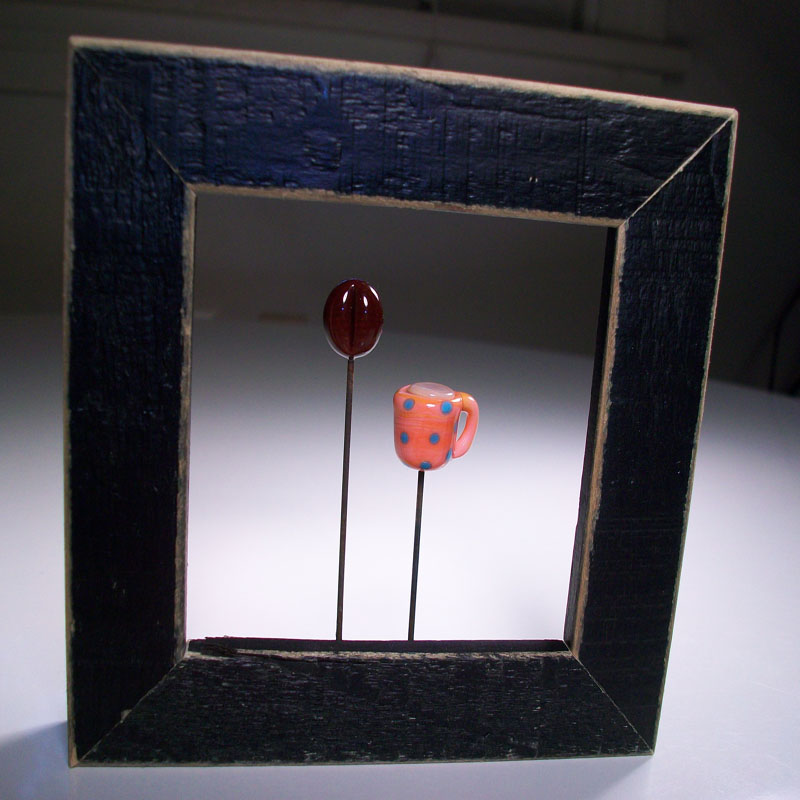
NEW Lampwork Home decor! I was excited to make these new tiny wall art designs in this fun coffee theme! "Cafe au Lait"- a little scarlet mug with coral spots and a red brown coffee bean are suspended in a tiny upcycled black frame. Measurements are 4"(10.16cm)tall by 3/4"(7.62cm) wide by 4"(10.16cm)across. Zig-zag metal assembly on back for easy hanging. "Light and Sweet"- Tiny coral and aqua speckled mug and red brown coffee bead are suspended in a tiny black upcycled frame. Measurements are 4"(10.16cm)tall by 3/4"(7.62cm) wide by 4"(10.16cm)across. Zig-zag metal assembly on back for easy hanging. The name "light and sweet" came from the way my friend Ashley described the coffee she had brought me one day. The terms mean with lots of milk and sugar :)
Well there they all are! Wasn't that EXCITING! I had so much fun working on these new designs! I can't wait to work on some more fun mixed-media pieces!
The artbeads.com fall blog is right around the corner. I have just placed my order for the blog and I can't WAIT to get the new items! I have all kinds of amazing designs bouncing around in my head!
I also found a place to order some super awesome and BRIGHT tiny leather cording like you saw in the designs above. I can't wait to get my hands on that and make some funky new stuff!
Thanks for celebrating with me about my design process and new pieces! I hope you enjoyed looking at them as much as I enjoyed creating them!
I might just be crazy. Pretty sure I am sick for sure. I tried to pass this nuisance off as allergies since I have fall allergies something fierce, but alas after my cocktail of pills in including: 1 generic zyrtec, 1 generic claratin and 1 generic benadryl I came to the conclusion that I must indeed be sick :( As you may know, I HATE being sick. I am a busy person so I hate to waste time with silly things like being sick. Thankfully I have an amazing husband that has run out to the store for tissues, holistic cold killers(Umcka), and of course whatever foody item that sounds good to me at the moment. I will say I miss drinking my morning coffee(which never sounds good when you are sick.) and I hate not being able to taste things as well.
So what am I currently taking to get better? 1 packet of Umcka(you need to take 5 a day for 2 days to help knock out your cold), 1 benadryl(until it wears off then down another), 2 echinacea, and 2 vitamin c(twice a day), simply juice orange juice and whatever food sounds good. So far I have had a yummy hot and sour soup from our favorite Chinese restaurant by the house. Later I will have some grilled cheese on eziekel bread with boars head american cheese, and tomato soup :D
Ok waaa waaa waaa about my sickness.. onto the real reason you come to read about my ramblings. Beads, right?
MIXED-MEDIA DESIGN...
Ok so you may or may not know that I have really been digging this mixed-media style jewelry right? So off I went to start designing. First of all when you design you need an element right? Well my love of coffee and Gazebo Blend by Starbucks lead me to the bead designs below. If you don't already know about Gazebo's awesomeness it's an African coffee(which are my favorites) and it's only out in summer around Julyish and some of August. So I am sorry to say that the link above will leave you empty handed, but just so you could get more info I attached the link.
I was inspired by some art that came with the packaging awhile back. I want to say it was 2009, but I could totally be wrong. I WISH I would have taken a picture of the card I had made into many soldered charms seeing as how it has been damn near impossible to find a picture of it. The ONLY picture I could find was the picture of the tiny Gazebo Blend sticker(which I also made into a soldered pendant). So I apologize about the tiny picture. The sticker is a little bit different colored than the actual card, but you kinda get the idea.
Ok here is the picture. Pretty isn't it? Some of my very favorite colors. Some bright and some earth tone. So what to do next? Choose the glass colors that most closely match the picture.
Here you can see the star shaped stacked flower. I started out with a red because I didn't have a closer match to the picture. That and the other color I chose was very close to another one of the stacking colors. Why does this matter? If there isn't enough contrast between colors the layers wouldn't be as defined. As you can see in 1 I started out with red for the bottom color. I tried layering the dots and raking the glass with stringers to get the shape. As you can see I wasn't super successful. It's so strange to me how the very first design I attempt looks like poo and the next one is not only better, but like 10x better. Weird...
Number 2 you can see I chose a different color for the bottom. This time I used coral. Ok so the color was better and the flower was puffier, but with all that stacking and raking I couldn't get the design I wanted on such a small bead.
I chose the larger size lentil for the base in the "design pick" bead and that seemed to work out the best. You can see all of the details of the flower along with nice pointed star petal ends.
The yellow ocher/ rust colored flower. I liked the flower labeled 1, but I wanted the flowers more pointy. As you can see in the "design pick" bead I got the petals much more pointy. Would you believe that's the same glass on both flowers? I got a really nice batch of Red Roof Tile that is kind of terra cotta and yellow ocher colored. I LOVE it.
Next onto the more "reddish flower". This one was a little harder to color match up. At first I wanted to use the True Red Coral odd lot I had, but it just wasn't quite the right shade for me. I ended up using a batch of Coral instead.
1 ended up being the "wrong" color. 2 was a raking job nightmare. It's all mushy and distorted looking. "Design pick" was "just right" with the coloring and shape.
Spiny tulip. Now this bugger gave me fits. As you can see it took me 5 beads to get the design I wanted. Bead 1 I was still using the red color for the beads before deciding to change to a different color. Bead 2 another trial of the first. Bead 3 yet another trial some of the other colored glass snuck in with the rakes. Gah! Bead 4 you can see where I patched it on the right and the petals still weren't pointy enough for me by just raking the glass.
"Design pick" Ah! There we go. I not only got most of the little details I wanted, but I love the spiny petals done by heating a small ball of glass from a stringer and pushing and raking it upwards towards the top of the bead(this is the same way you do leaves). The finished bead reminds me of the Super Mario games or the plant in "Little Shop of Horrors". At any rate I LOVE this bead!
Now for some more coffee related designs in the same color palette....
The glowing coffee bean. This little guy has the rays of light around it with the nice little "Ahhhh" that you hear when you see glowing things desired. 1 I didn't really like the rakes of glass. It was a little too much yellow and looked like a starfish with a coffee bean on top.
"Design pick" was just the right amount of "rays" for the look desired.
Steaming cups of coffee. Ugh.. as you can see this one took me quite a few times. 1 you can see the steam designs are kind of scraggly looking and messy. 2 you can see better squiggly designs, but because of the shape of the heart I couldn't squeeze in a tiny spiral just above the cup and it made the steam look like "whiskers" or something.
3 after choosing 3 different colors for the possible steam: Messy Cirrus, Messy Marshmallow and effetre Anice White. I did a quick blog of glass to try out the other colors to see if their translucency showed up layered on top of glass and found that it just looked more like clear(Bummer! They are the perfect color for steam by themselves, but their translucency doesn't show up on top of a color.). Next I decided I didn't really want something quite stark white so I chose effetre Anice White. For the design I did a few twists with cold stringer to get the swirly billows of steam, but wasn't too excited with the results. I was still running into the space issue at the "v" point of the heart there just isn't enough glass to decorate.
"Design Pick" was going to be the finished design. I guess I would just have to give up on my steam swirls on a heart design due to the lack of space and look of the steam with the space given.
I guess I will just have to use the steam design on beads like this older design of mine.
SOLDERING CHARM TIPS....
While I wish I would have taken some pictures of the soldered charms before they were made into jewelry I do have a list of things I learned about soldering to share. I am by no means and expert at soldering charms, but in my short bit of making them I have learned so much and really learned the most the last(most recent) time I made them.
1.Gravity works, that’s why it was invented. Use gravity to let your solder flow.
2.Think of your solder like water. When it’s hot it flows like a stream.
3.Solder will go where ever the heat is. Use the heat to make the solder go where you want it.
4.Take a deep breath in and exhale while doing a stroke of solder down a surface. Not only does it relax you, but it allows you to let the solder glide across the surface.
5.If you think you have enough solder add more, you want a nice thick coat of solder to push around for nice edges.
6.Be patient. If it’s not working out, take a break and come back.
7.If the solder isn’t flowing enoughadd more flux. The get along well.
8.CLEAN YOUR IRON. If you notice patina on the iron clean it on the sal ammoniac bar. It shines up the patina on the iron and seems to help the solder flow better.
9.Clean off ALL sticky tape residue.If you notice black spots on your solder it’s the tape residue.Scrape off with a razor and then apply more solder. Notice how it sticks this time?
10.To do the “beading” technique on the sides get a generous amount of solder and put the charm on it’s side. Use the thin tip of the soldering iron and hold the iron vertical. You want to heat the solder and almost let it “drip” down the side. This gives you that gorgeous bubbled edge :D
11.You can scoot solder to one edge by going from top to bottom almost like you are brushing hair. When you have “brushed” the solder to the one edge heat and glide along your new formed edge to smooth out the solder.
12.Like lampworking it’s ALL ABOUT HEAT CONTROL! Learn how the heat moves the solder and you’ve figured everything out!
13.Marvel at your accomplishment :D
14.Let your iron get HOT. The hotter it is the better the solder flows. An iron that is too cold is useless and will just make you want to throw your pieces at a wall.
15.If you have a dimply texture to your metal add some more flux and run the iron over it. It should smooth out.
If you have ANY questions about jewelry assembly technique, lampwork, soldering or anything else please feel free to message me. I know how terribly frustrating it is when you are trying to figure out what is going wrong with your technique and have no one to ask at the time you are creating!
Stay tuned for the finished pieces! You are going to LOVE them!
Much love,
Genea
P.S. What do you think of the new "clothes"? It's not lime green and aqua, but it's bright, has swirls and lots of color! <3